The Plant-Based Community Cookery School
The Plant-Based Community Cookery School
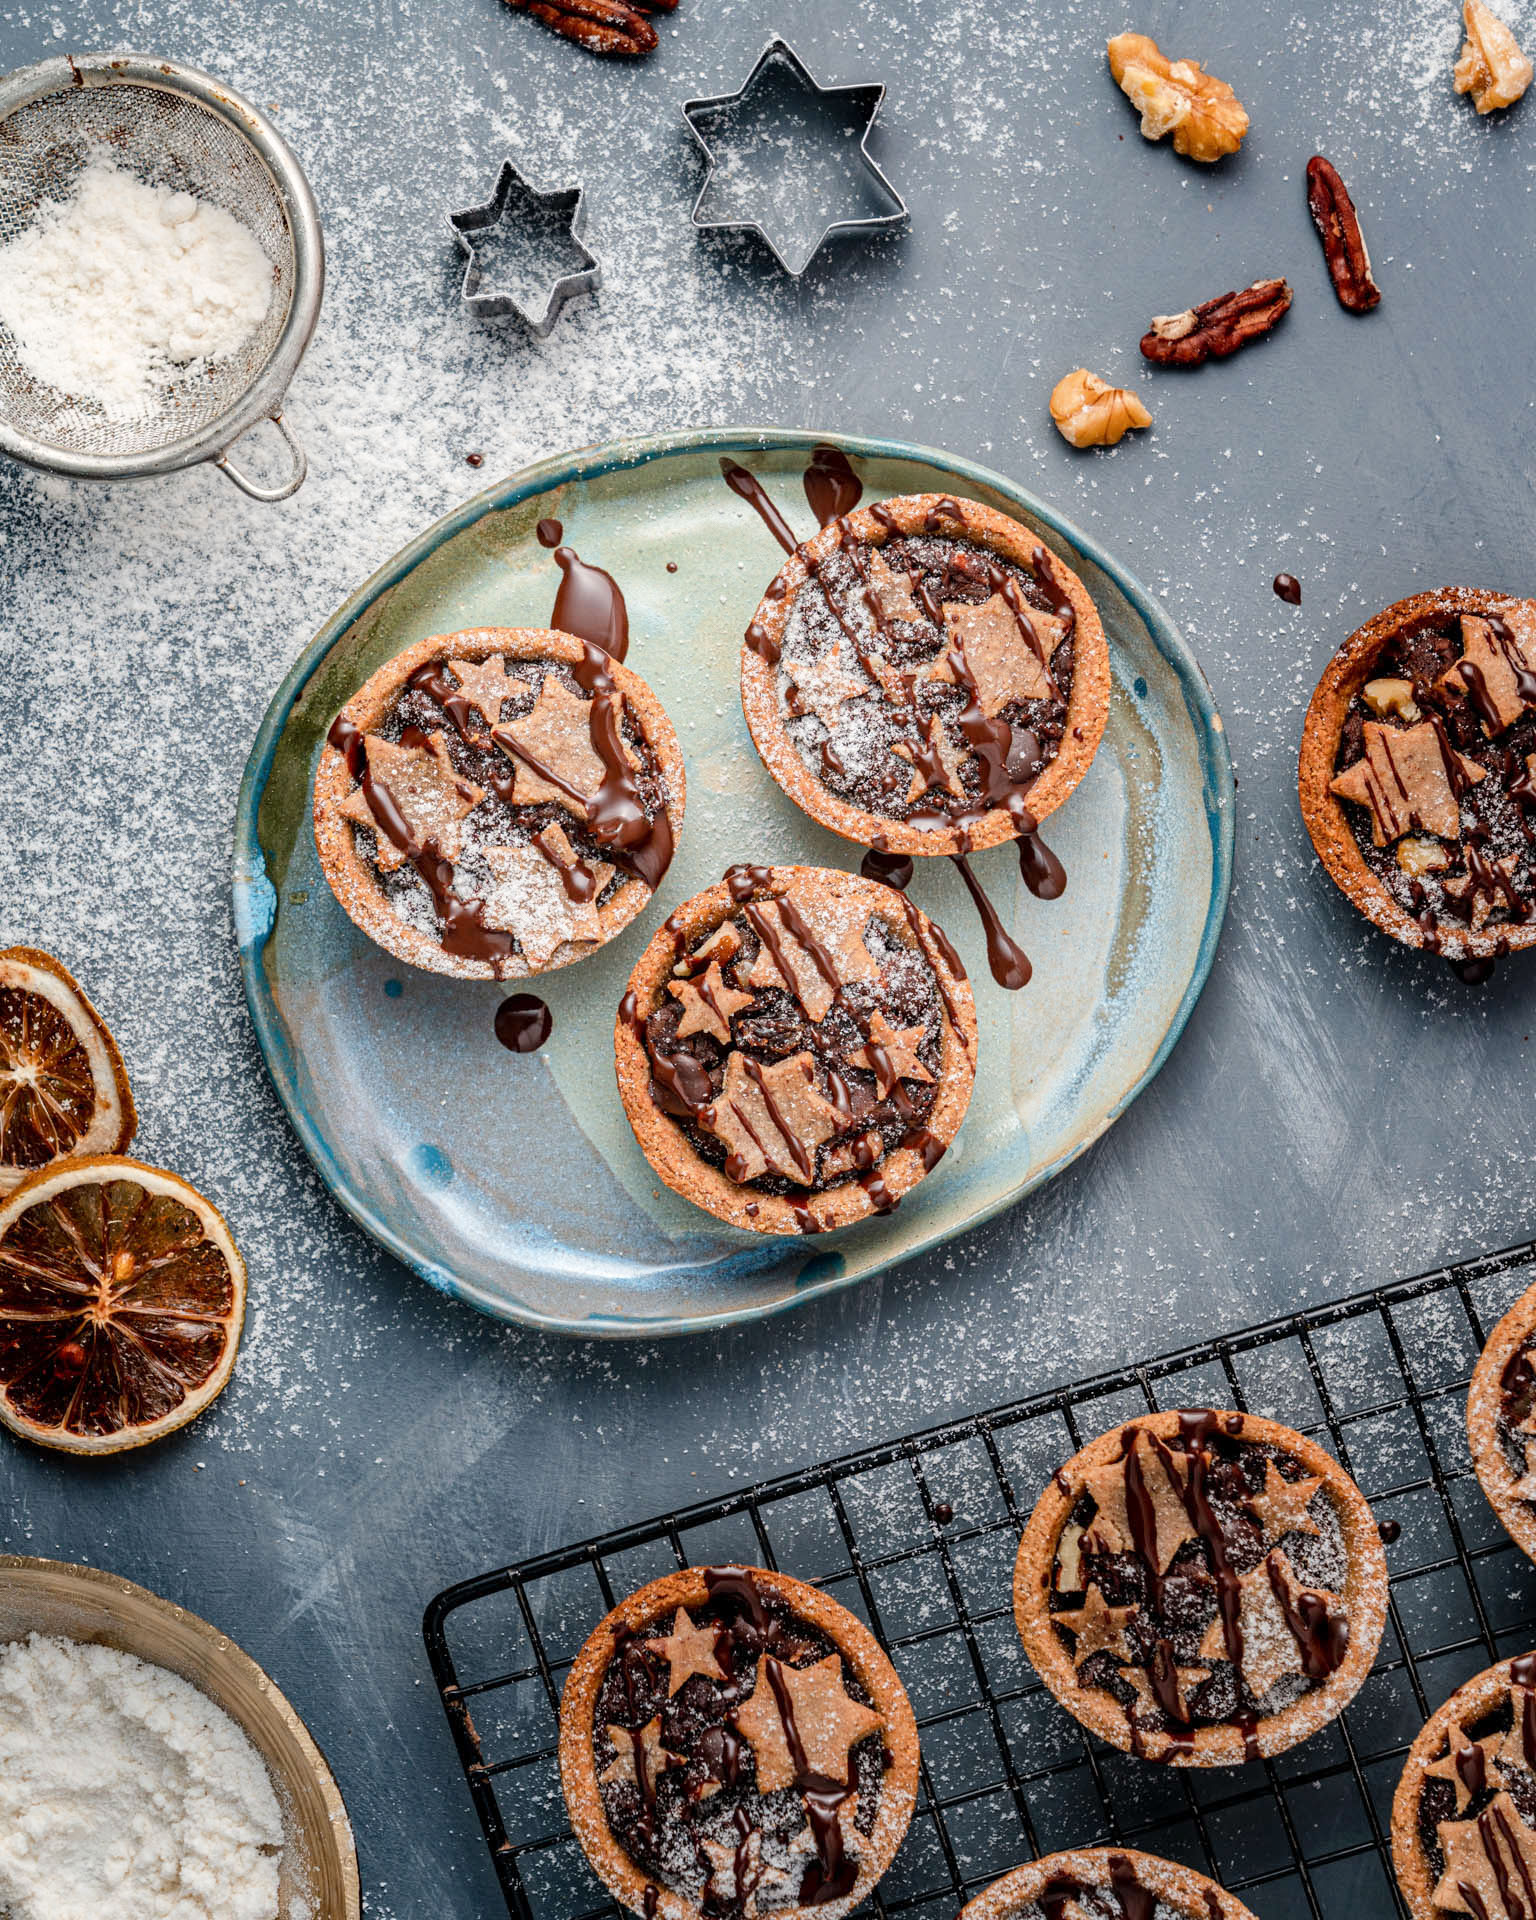
This fabulous recipe comes from MIH family member, teacher and food alchemist Amy Hiller! These festive treats are absolutely delicious and I think they tick a lot of boxes! Instead of stewed fruit, the filling is a rich, thick chocolatey mixture bursting full of texture and flavour.
Makes 17/18 small pies.
Filling
50g (1/2 cup) chopped walnuts
50g (1/2 cup) chopped pecans
115g (1/2 cup) full fat coconut milk from a can
Zest of 1 orange (omit if you don’t like chocolate orange)
80g (1/2 cup) good-quality dark chocolate (I prefer to use chocolate sweetened with coconut sugar such as Ombar or these choc chips)
90g (1/2 cup) cooked kidney beans
1 tablespoon of maple syrup
2 tablespoons cacao/cocoa
Tiny pinch of salt
1/2 a medium apple chopped into very small chunks
120g raisins
Pastry
100g soft pitted dates
100g (¼ cup + 3 tbsp) almond butter
150g filtered water
170g oat flour (certified gluten free if required - regular oats can contain some gluten)
50g tapioca flour
1 teaspoon baking powder
Pinch of salt
Optional toppings:
Powdered sugar or coconut flour for dusting
Melted chocolate for drizzling
Begin by making the filling. Preheat your oven to 180°C/160°c Fan/356°F and then toast your nuts for about 6 minutes, until they start to turn a little golden and become fragrant. Careful not to burn them. You will be using the oven again later but I recommend turning it off once you’ve toasted the nuts.
Next, add coconut milk and orange zest to a small pan and simmer for around 5 minutes to allow the orange zest to infuse into the milk. Don’t bring the milk to a boil, just a nice simmer.
Place your chocolate chips in a bowl and then pour your (not boiling) milk over it and just leave it without mixing for a minute.
Stir together the now melted chocolate and orangey milk until it is smooth and combined - it will be quite runny. Leave to cool for a few minutes.
To a small blender (I used my nutribullet for this) add the kidney beans, maple syrup and just enough of the chocolate mixture to get the blender going. You don’t need this mixture to be totally smooth, it will be more like a batter than a sauce.
Add the blender mixture back into the rest of your chocolate sauce along with the cacao and pinch of salt and mix well until everything is well combined.
Finally, stir in your toasted nuts, raisins and little apple chunks and set aside while you make your pastry.
To make the pastry, heat your oven again to 180°C and either lightly grease a muffin pan or prepare a silicone one that you trust to be non-stick.
Now, add dates, almond butter and water to a blender and blend until completely smooth.
In a medium sized mixing bowl, combine the oat flour, tapioca flour, baking powder and salt and mix well.
Pour the wet mixture into the dry and combine with a spoon. I find after a bit of mixing, it’s easiest to use a spatula to scrape the bottom of the bowl and combine everything.
Once combined, let the dough sit for just a minute. It tends to firm up so best to let it get used to itself before you add extra flour unnecessarily.
If after letting it sit, the dough is so sticky you can’t handle it, use a tiny bit more flour. If it’s dry and not coming together, add a tablespoon of water.
The dough should be soft and easy to roll out without sticking to your hands. I roll my dough onto a silicone mat with a silicone rolling pin and do not use any extra oat flour. If you need to, use as little oat flour as possible so you don’t dry the dough out.
Roll out your dough to about 1/2 cm (don’t worry too much about this) and then, using a circle cookie cutter you can cut out the pie cases. I use a cookie cutter that is just a little larger than the hole in my muffin tray, so once I have placed the circles inside the muffin holes, they come up about half way. To do larger, deeper pies, you will need to cut larger circles.
As you cut out each circle, it’s a good idea to also cut out whatever shape or shapes you intend to put on the top of your pies so you know you have enough dough. Or you could cut out one topping, weigh it and then set aside that same amount (plus a little extra) for each pie and then cut them all out when you’re ready. Or just wing it. Whatever you find easiest.
Gently ease your cut out circles into your muffin tray and use your fingers to press the dough into the edges by pressing into the sides and bottom. if your dough tears at the bottom, don’t worry, just patch it up with a blob of dough.
Once your cases are in, prick the base of each one with a fork a few times, then bake in the oven for 8 minutes.
Prepare your pastry toppings while the cases are baking. Stars look particularly dreamy!
Next, fill your half-baked pastry cases with filling. I like to be quite generous. It won’t bubble and overflow like regular mincemeat so you can fill them to the top.
Pop on your cut out toppings and brush them with a little bit of coconut milk before baking for a further 12 minutes. By this time the edges of the cases should be turning slightly golden. This pastry doesn’t go very brown. You will know they’re done once the pastry feels cooked, is a little flexible, but firm enough to handle and lift carefully out of the pan. Once cool enough to handle, check the bottoms. If they look and feel cooked they probably are. If they still seem very soft or look wet, give them a little more time. Go for 2 minutes at a time. Don’t over-do it trying to get a deep golden brown or you will get dry pastry.
Allow your no-mince pies to cool on a drying rack. If you want to, you can glam them up by dusting with a sprinkling of either powdered sugar or coconut flour (great hack if you don’t eat white sugar) before drizzling with melted chocolate.
Best enjoyed a little bit warm!
Store at room temp for a few days in an airtight container, or in the fridge for a little longer. They’re yummy cold, but as with all baked goods will dry out a little in the fridge.
For more delicious recipes from Amy visit her website at www.amyhiller.com